A video editing prompt tells an AI editor three things: which footage to change, what result you want, and what must stay the same. The 26 video editing prompts below are for footage you already have, such as a talking-head recording, an interview or a finished video, not for generating new clips. They follow the order an editor works in: find the moments, make the first cut, fix the structure, then add captions, B-roll and audio, and deliver.
Each prompt pastes into the Agent in ChatCut as written. Select the clip or passage first, or type @ to reference it, and change any example detail (a topic, a length, a language) to fit your video. Every card ends with what to check, because a prompt directs an edit; it doesn’t approve it.
Key Takeaways
- A useful editing prompt names the target, the result, what to keep, what not to add, and what to report back. “Make it more engaging” names none of them.
- Work in stages. Get the speech right first, then add captions, B-roll and music. One stage per prompt makes a bad result easy to trace and undo.
- Ask for a list before an edit when the choice is yours: which takes, which soundbites, which Shorts.
- Prompts for generating new footage are a different job. For those, see our AI video prompts.
How to write video editing prompts that work
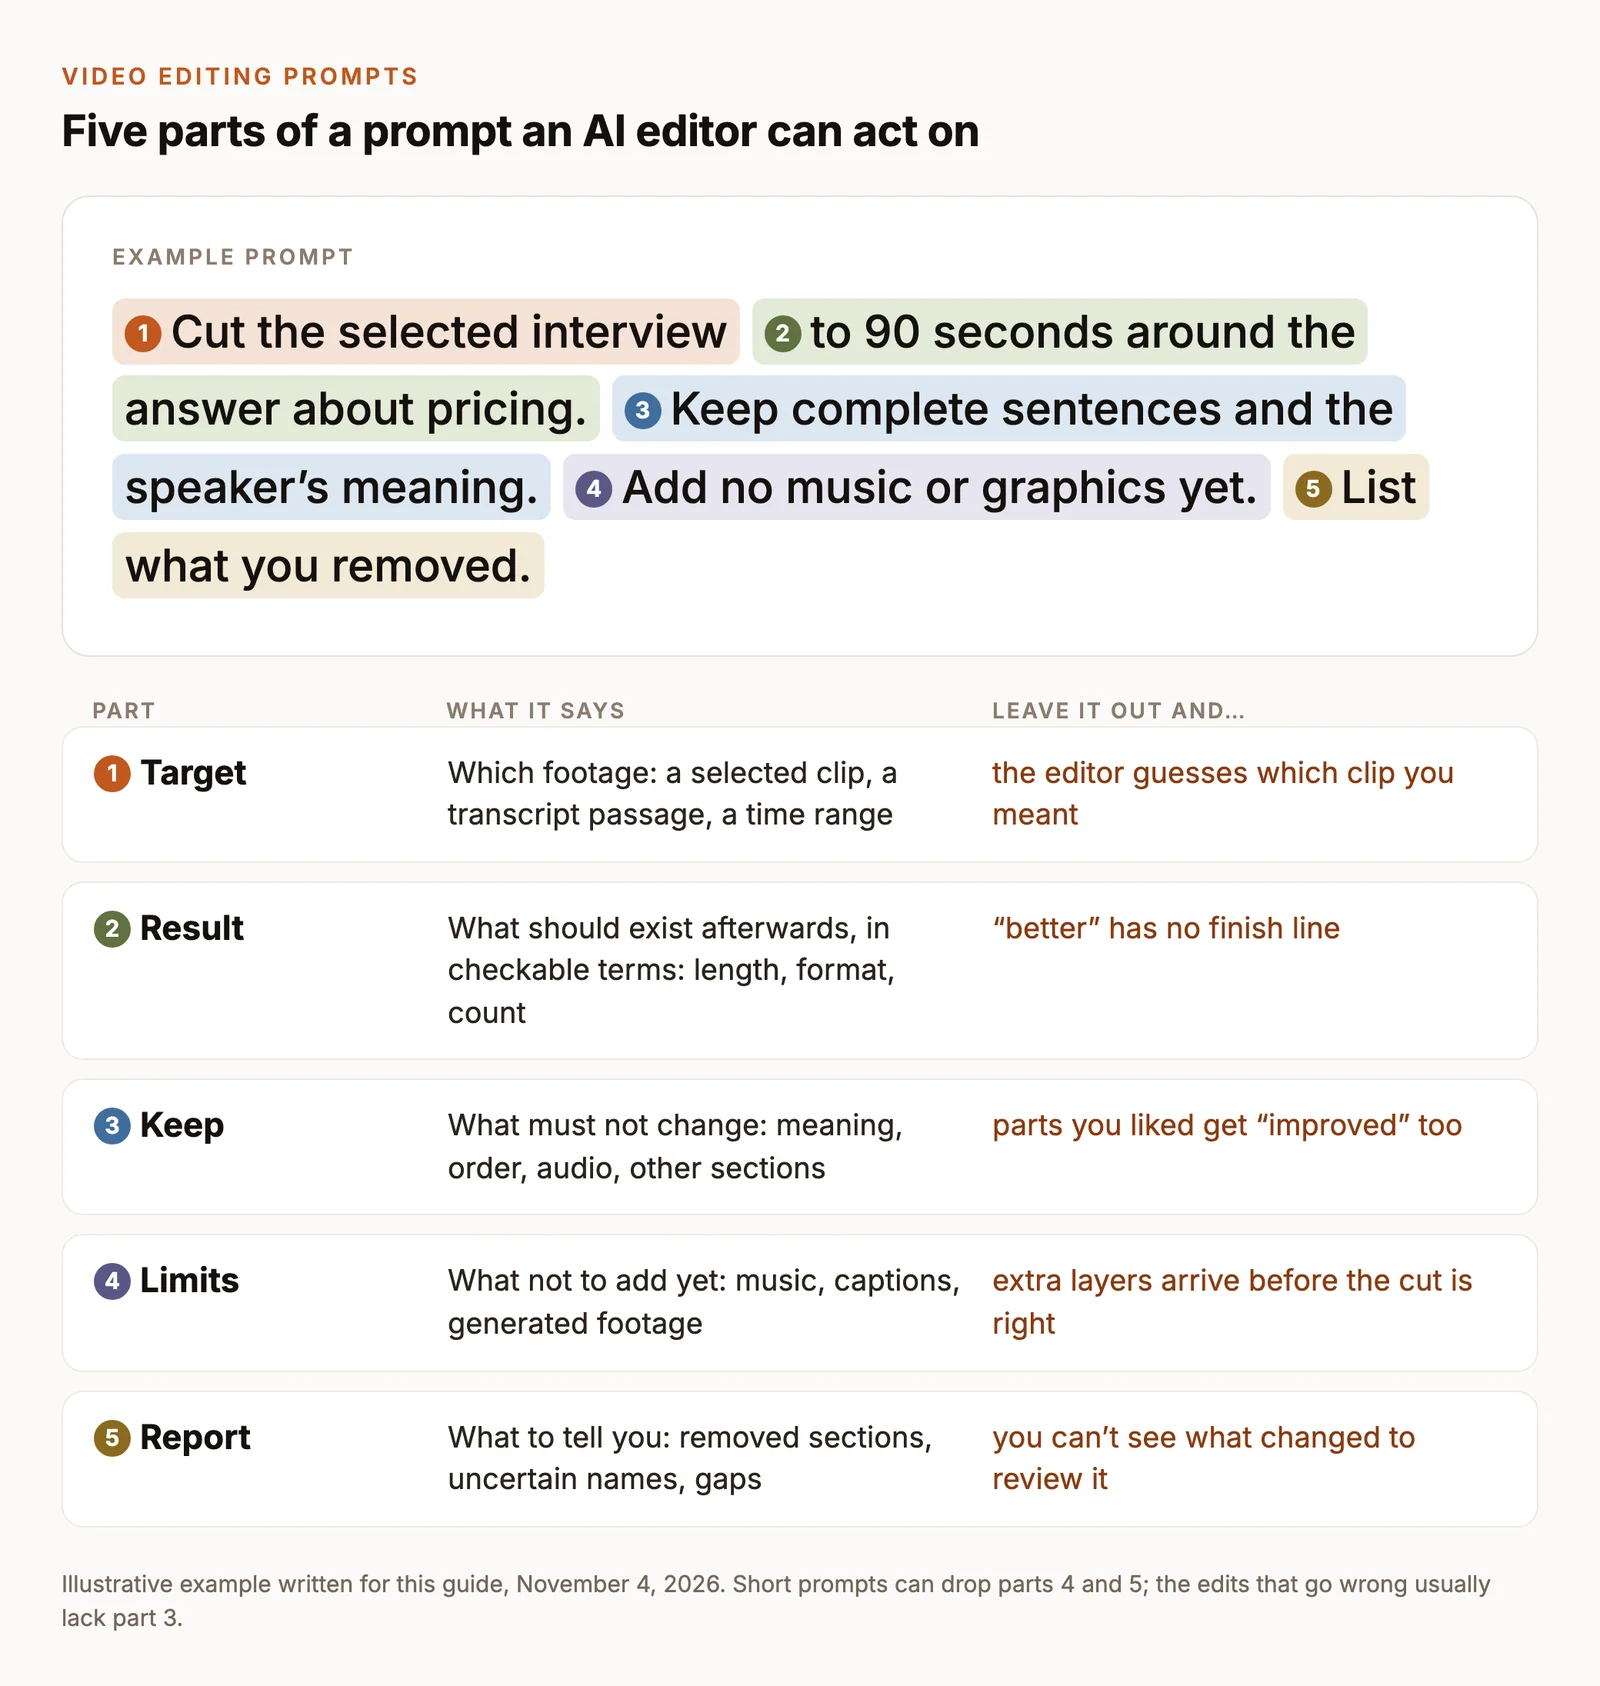
Most weak editing prompts describe a feeling instead of an edit. An AI editor can act on a cut, a duration, a format, a track or a caption. It can’t act on “punchier” without guessing what you meant. Build each request from five parts:
- Target. The footage the edit applies to: the selected clip, a passage of transcript, a time range or the whole timeline. In ChatCut, a reference chip from Selection Mode or @ removes the guesswork.
- Result. What should exist afterwards, in terms you can check: a 90-second cut, a 9:16 version, captions in two lines.
- Keep. What must not change: the speaker’s meaning, the order, the audio, the widescreen version, everything outside the passage.
- Limits. What the editor must not add: no music yet, no generated footage, nothing beyond the selected clip.
- Report. What you want back so you can review the work: which takes were kept, which jump cuts couldn’t be covered, which names are uncertain.
Compare “make this interview shorter and more engaging” with “cut the selected interview to 90 seconds around the answer about pricing; keep complete sentences; add nothing else; list what you removed.” The first asks the editor to guess. The second can be done, checked and undone.
Run one stage at a time. If one message asks for cuts, captions, B-roll and music and the result is wrong, you can’t tell which instruction caused it. Get the spoken track (the A-roll) right first, then layer the rest on top. Our ChatGPT editing guide explains that A-roll-then-B-roll order in more detail.
Before you paste: set up the project
- Import the footage. In ChatCut, open My Assets → Upload → Files… (or Folder…) and wait for each card to finish processing. Speech is transcribed so the Agent can work from the words. Put any B-roll and music you want used into My Assets too; a file attached to a single message is context for that message, not project media.
- Choose Agent. Open the AI panel and keep the composer in Agent mode.
- Point at the footage. Turn on Selection Mode with the pointer button below the prompt field, then click a clip, select transcript words or mark a time. A reference chip appears in the prompt. When a prompt below says “the selected clip” or “this recording”, that chip is what it means.
- Make it reversible. Save a version before a big pass (Versions → Save Current Version) and use Undo for a single step. Edits change the timeline; the source files are never rewritten.
The prompts work in ChatCut Desktop (macOS 13+ on Apple silicon or Intel, Windows 10+ x64), in the web app, and from Claude Code or Codex with the ChatCut plugin, where you name the project and clip instead of selecting them. Requests to ChatCut’s built-in Agent use credits based on how much the model processes; from Claude Code or Codex, your agent’s own plan covers that part. Generating new media adds its own charge. Uploads, transcription, manual edits and export don’t use credits.
Prompts to find the right moments
Start by asking questions, not giving orders. A list you can check is cheaper than an edit you have to undo.
1. Search before you cut
Use it when you know you said something good but not where. Swap “pricing” for your topic.
Check: you get a list, not an edit. Click each time range and listen in context before keeping it.
2. Keep the best take
Use it when you recorded the same line or section several times.
Check: play every join between sections. A “clean” take can still have the wrong energy or a slightly different wording you preferred.
3. Group interview soundbites by theme
Use it when the raw material is several interviews and you need to see what you have.
Check: confirm who is speaking and whether the soundbite still means the same thing without the question before it.
Prompts for the first cut
4. Make a clean first cut
Use it on any talking-head recording before anything else.
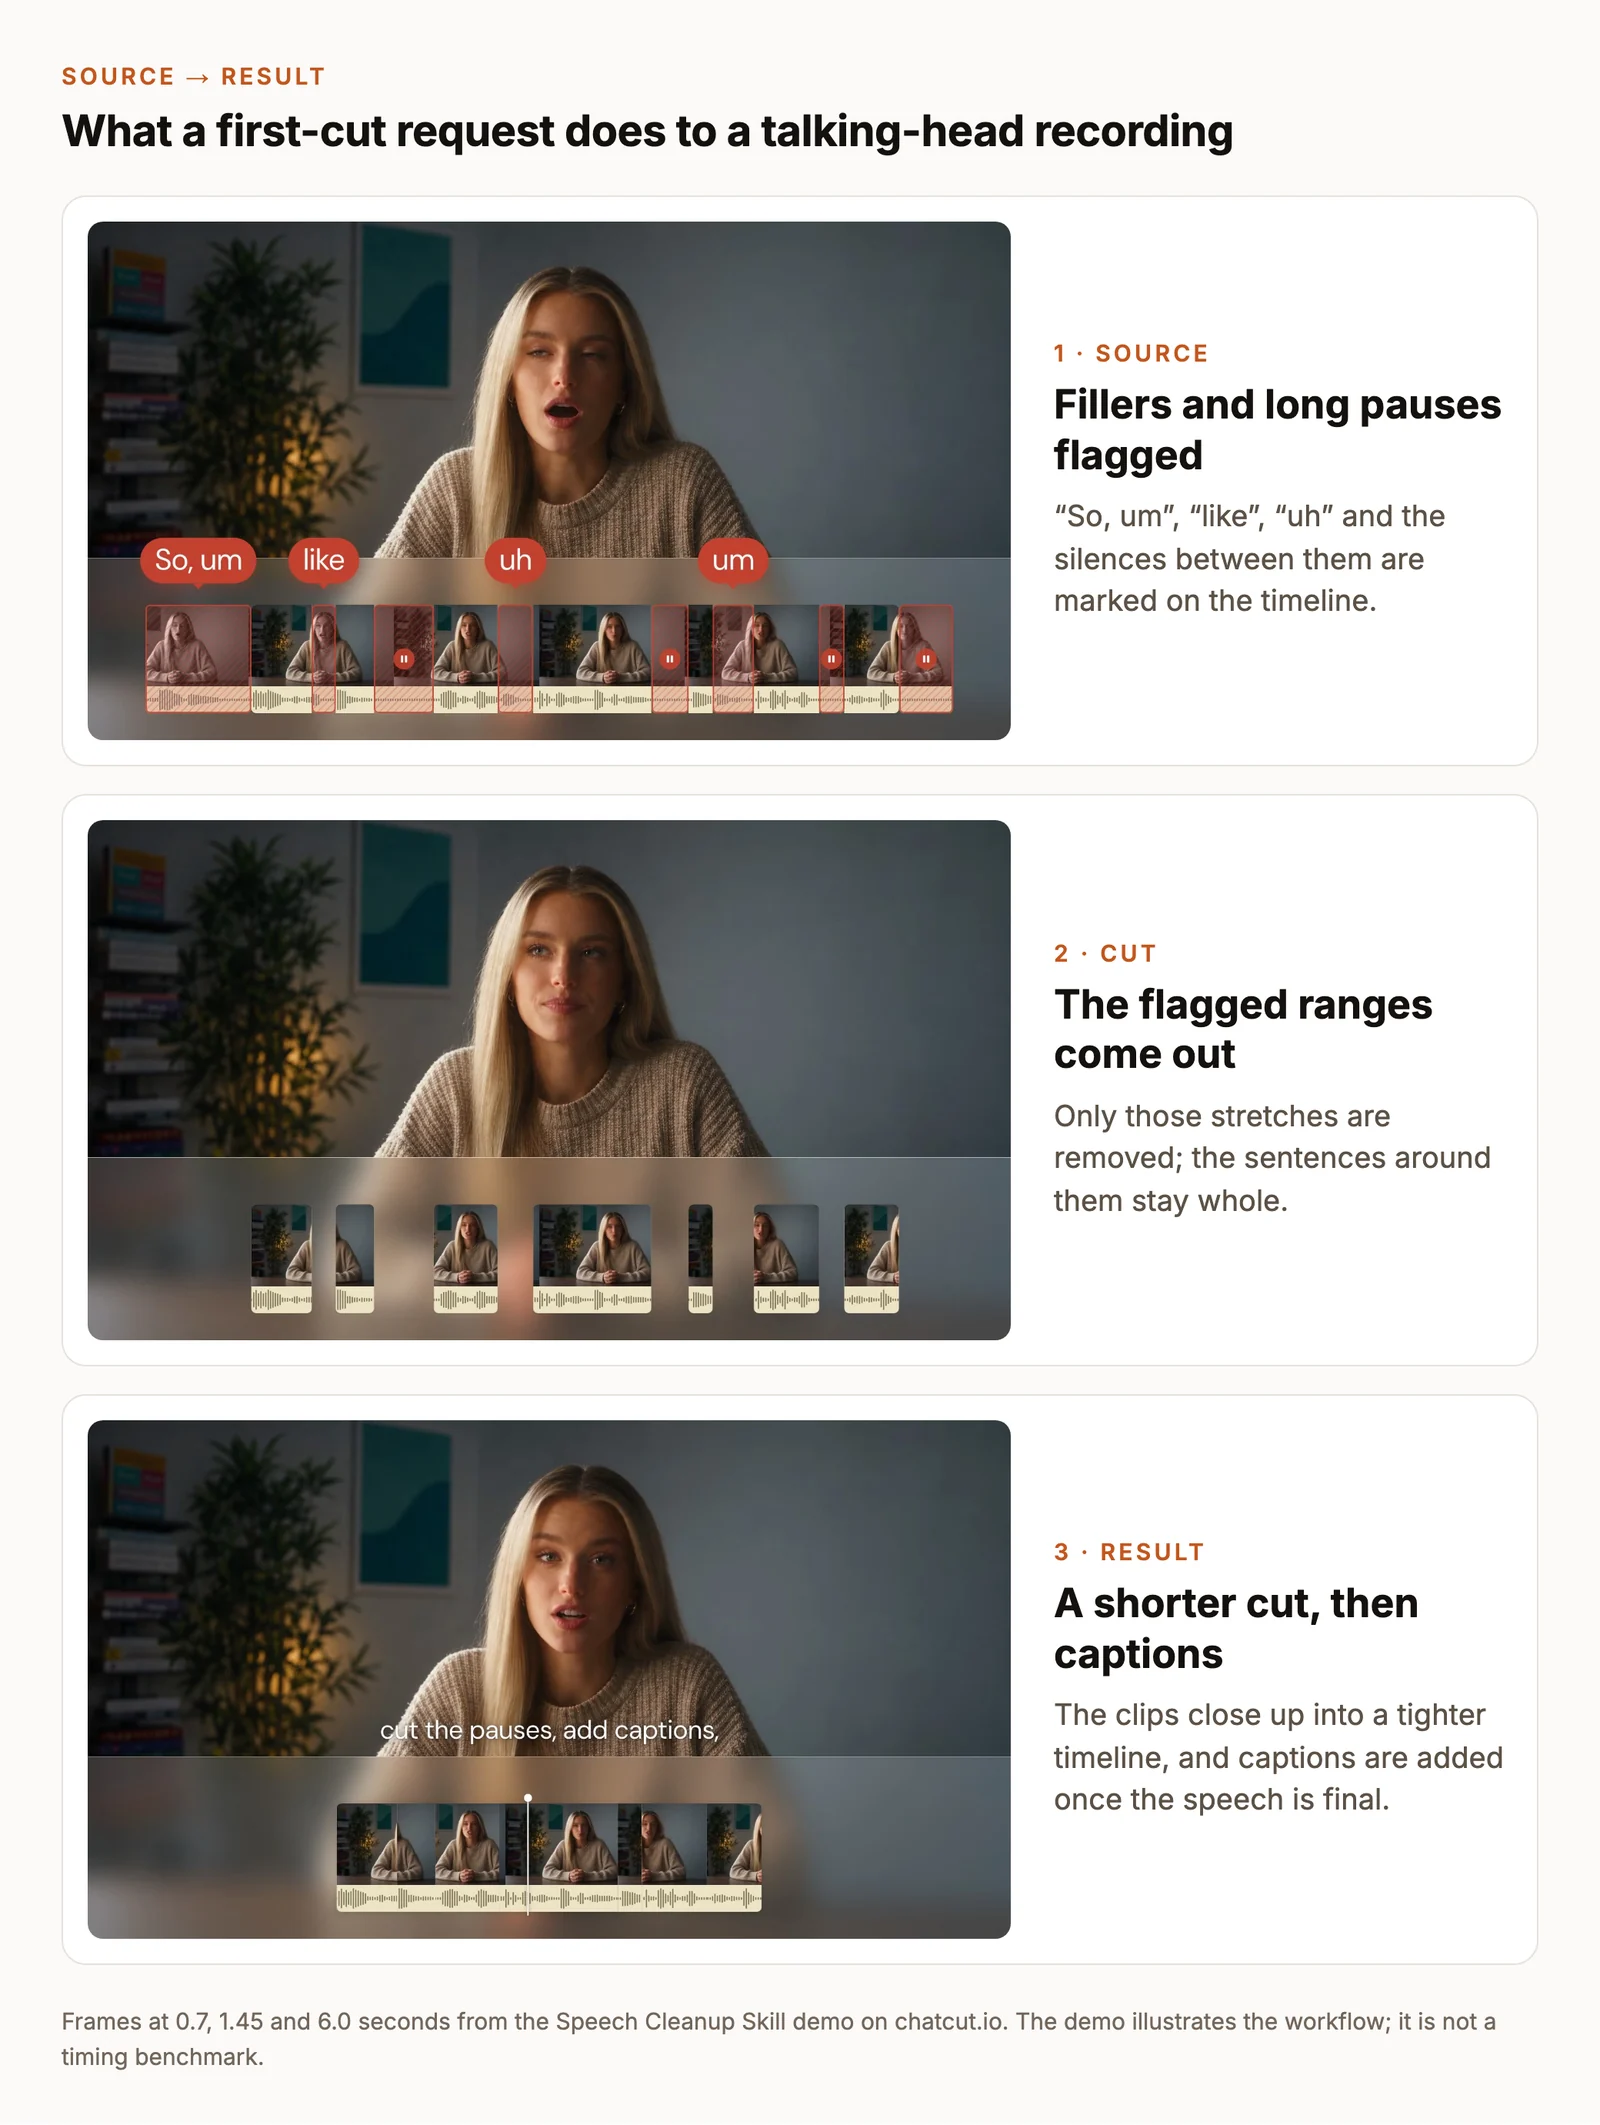
Check: listen across each cut. Restore a breath or pause that carries meaning, and make sure no removed word changed the speaker’s point.
5. Shorten long pauses only
Use it when the content is right but the delivery drags.
Check: 0.8 seconds is a starting point, not a rule. If the result sounds breathless, ask again with a longer threshold. To set one pause length by hand, use the Pauses control in the Transcript.
6. Remove filler words
Use it when “um” and “uh” are the main problem.
Check: filler words often sit right before an important point. Make sure the sentence that follows still starts cleanly.
Prompts to fix structure and length
7. Reorder into a clear structure
Use it when you recorded sections out of order or the story wanders.
Check: read the new order as a script. If a step depends on something said later, move it or ask for a bridge line you can record. To try a structure by hand, drag paragraphs in the Transcript’s Clip view.
8. Find a cold open
Use it when the video starts slowly and you want to open on the strongest line.
Check: a cold open should promise what the video delivers. Skip a line that’s exciting but answered nowhere in the video.
9. Cut to a target length
Use it when the platform or client has a hard limit.
Check: the removal list tells you what the viewer loses. Put back anything the takeaway depends on and trim somewhere else.
10. Split one recording into several videos
Use it when a long session covers several topics that deserve their own uploads.
Check: each new timeline should open with a sentence that makes sense to someone who didn’t see the others.
11. Split a finished video into shots
Use it on an exported video you want to re-edit, such as an old upload or a client file. This runs in ChatCut Desktop, which detects hard cuts on your computer.
Check: dissolves and flashes can produce missed or extra cuts. Scrub the new edit points before you rearrange anything.
Prompts for Shorts and vertical versions
12. Turn a long recording into Shorts
Use it on podcasts, interviews, lessons and livestreams.
Check: compare each short with the conversation around it, and watch the crop whenever the speaker moves or a second person enters the frame.
For a documented run with the source episode, the exact prompt and the three finished files, see our test of turning one podcast into three Shorts. It was recorded in August 2026 through ChatGPT’s desktop app, so treat its setup steps as historical.
13. Make a vertical version of an edit
Use it when the horizontal video is finished and you need a 9:16 copy.
Check: play every shot in the new frame, especially screen recordings and two-person scenes. To change the canvas yourself, use Aspect Ratio → 9:16 below the Viewer, then move or resize shots that don’t fit.
Prompts for captions and on-screen text
14. Add readable captions
Use it once the cut is final, so the captions don’t need redoing.
Check: turn the sound off and read along. Each line should appear with its words and stay long enough to read.
15. Correct names and numbers in captions
Use it before you publish anything with names, brands or figures in it.
Check: listen to every flagged word yourself. Fix spelling in the caption text, not by deleting words in the Transcript: deleting there cuts that stretch of audio and video. The Transcript and Captions guide explains the difference.
16. Translate the captions
Use it when the same video needs subtitles in a second language.
Check: have a fluent speaker read the translation once. Each language can be exported as its own SRT file. To dub the voice as well, see how to translate a video.
17. Add a lower third
Use it the first time a speaker appears. Replace the name and role with your own.
Check: on a phone-sized preview, the lower third and the captions shouldn’t overlap or compete.
Prompts for B-roll
B-roll is any footage laid over the main recording: a cutaway, a screen recording, a product shot, a photo. Import your own clips to My Assets first so the Agent has something to choose from.
18. Cover jump cuts with your own B-roll
Use it after the first cut, when the remaining jumps in the picture are distracting.
Check: each cutaway should show what the words describe. A clip that’s merely pretty pulls attention away from the point.
19. Put a screen recording over the narration
Use it for tutorials and product walkthroughs.
Check: the click on screen should happen as you say it, not a sentence later.
20. Suggest generated B-roll, then wait
Use it when you have no footage for a passage and would consider generating some.
Check: generating video needs a paid plan and uses credits, so review the estimate before you approve. If a generated shot looks like a real event, platforms such as YouTube ask you to disclose realistic AI content when you upload.
Prompts for audio
21. Clean up background noise
Use it on dialogue recorded with fans, traffic or room echo.
Check: listen on headphones. Voice isolation is meant for speech, not music, and it can remove ambient sound you wanted. Right-click a clip and choose Restore original audio to undo it. Our background noise guide compares it with Premiere, DaVinci Resolve and Audacity.
22. Lower music under the voice
Use it once the music you want is in My Assets and selected.
Check: listen on a phone speaker as well as headphones; music that sounds quiet on headphones can still cover speech on a phone. You can set the same thing by hand under Track controls → Audio ducking.
23. Sync two cameras and a separate microphone
Use it for podcasts and interviews shot on more than one device.
Check: play through a clap or a clear phrase to confirm the sync, then watch the switches. A cut in the middle of a reaction often feels better a beat later.
Prompts to revise and deliver
24. Change one thing only
Use it for every revision after the first pass.
Check: compare the boundary between the revised part and the rest. Name one clip, passage or time range per request.
25. Check before you export
Use it when you think you’re done.
Check: treat the list as a starting point and still watch the whole video once at full screen.
26. Export the video and subtitles
Use it at the end, or choose Export → Video and Export → Subtitles yourself.
Check: open the actual files, not just the completion message, and play them with sound. ChatCut Desktop can also export locally at 4K; cloud exports go up to 1080p.
If the result isn’t right, add the missing part
Resending the same prompt usually gets you the same kind of result. Find what the prompt left open and close it:
| What went wrong | Add this to the prompt |
|---|---|
| It cut words you needed | ”Keep complete sentences and the speaker’s qualifications.” |
| It changed parts you liked | ”Change only the selected passage. Leave everything else unchanged.” |
| It worked on the wrong clip or track | Reselect with Selection Mode, or name the track (V1, A1). |
| It added music or graphics you didn’t ask for | ”Add nothing else yet.” |
| Captions misspell a name | ”The guest’s name is spelled Siobhan.” Give the exact spelling. |
| The cut is still too long | Give a number and an order: what goes first, what must stay. |
Two limits no prompt fixes. An AI editor can’t recover a point that was never recorded, and it can’t tell whether a shortened quote still says what the speaker meant. Both are yours to check.
Using these prompts with ChatGPT
If you came looking for ChatGPT video editing prompts because you want ChatGPT itself to make the edit, know one limit first: in the ChatGPT website it can’t open a project timeline, and ChatCut can’t be installed there. Two routes work.
- Connect ChatCut from the desktop app. With the ChatCut plugin connected, the prompts above work from a Codex or ChatGPT desktop task, and the edits land in a ChatCut project you can open. The setup guide walks through it.
- Use ChatGPT to plan, then cut elsewhere. Paste a timecoded transcript under the prompt below and ChatGPT returns a paper edit: a list of what to keep, in order. You then make the cuts in your editor. The same prompt works as-is in ChatCut, where the transcript is already there.